
A healthy, two-sided market is an auction. Price rotates up and down in small steps, buyers and sellers both get filled near fair value, and the chart prints overlapping candles. But sometimes the auction breaks: a burst of aggressive one-sided orders — the kind institutional execution produces — rips price through a range so fast that the other side never gets to participate. The chart records that failure of the auction as a fair value gap (FVG), also called an imbalance.
The three-candle pattern
An FVG is defined by three consecutive candles. In the bullish case:
- Candle 1 sets a high.
- Candle 2 is the displacement candle — a large-bodied move up.
- Candle 3 sets a low that is above candle 1's high.
The space between candle 1's high and candle 3's low is the gap: a band of prices where, on this timeframe, price never traded on the way up — no wick from either side touched it. Candle 2 simply moved too fast. A bearish FVG is the mirror image: candle 3's high sits below candle 1's low, leaving an untraded band beneath.
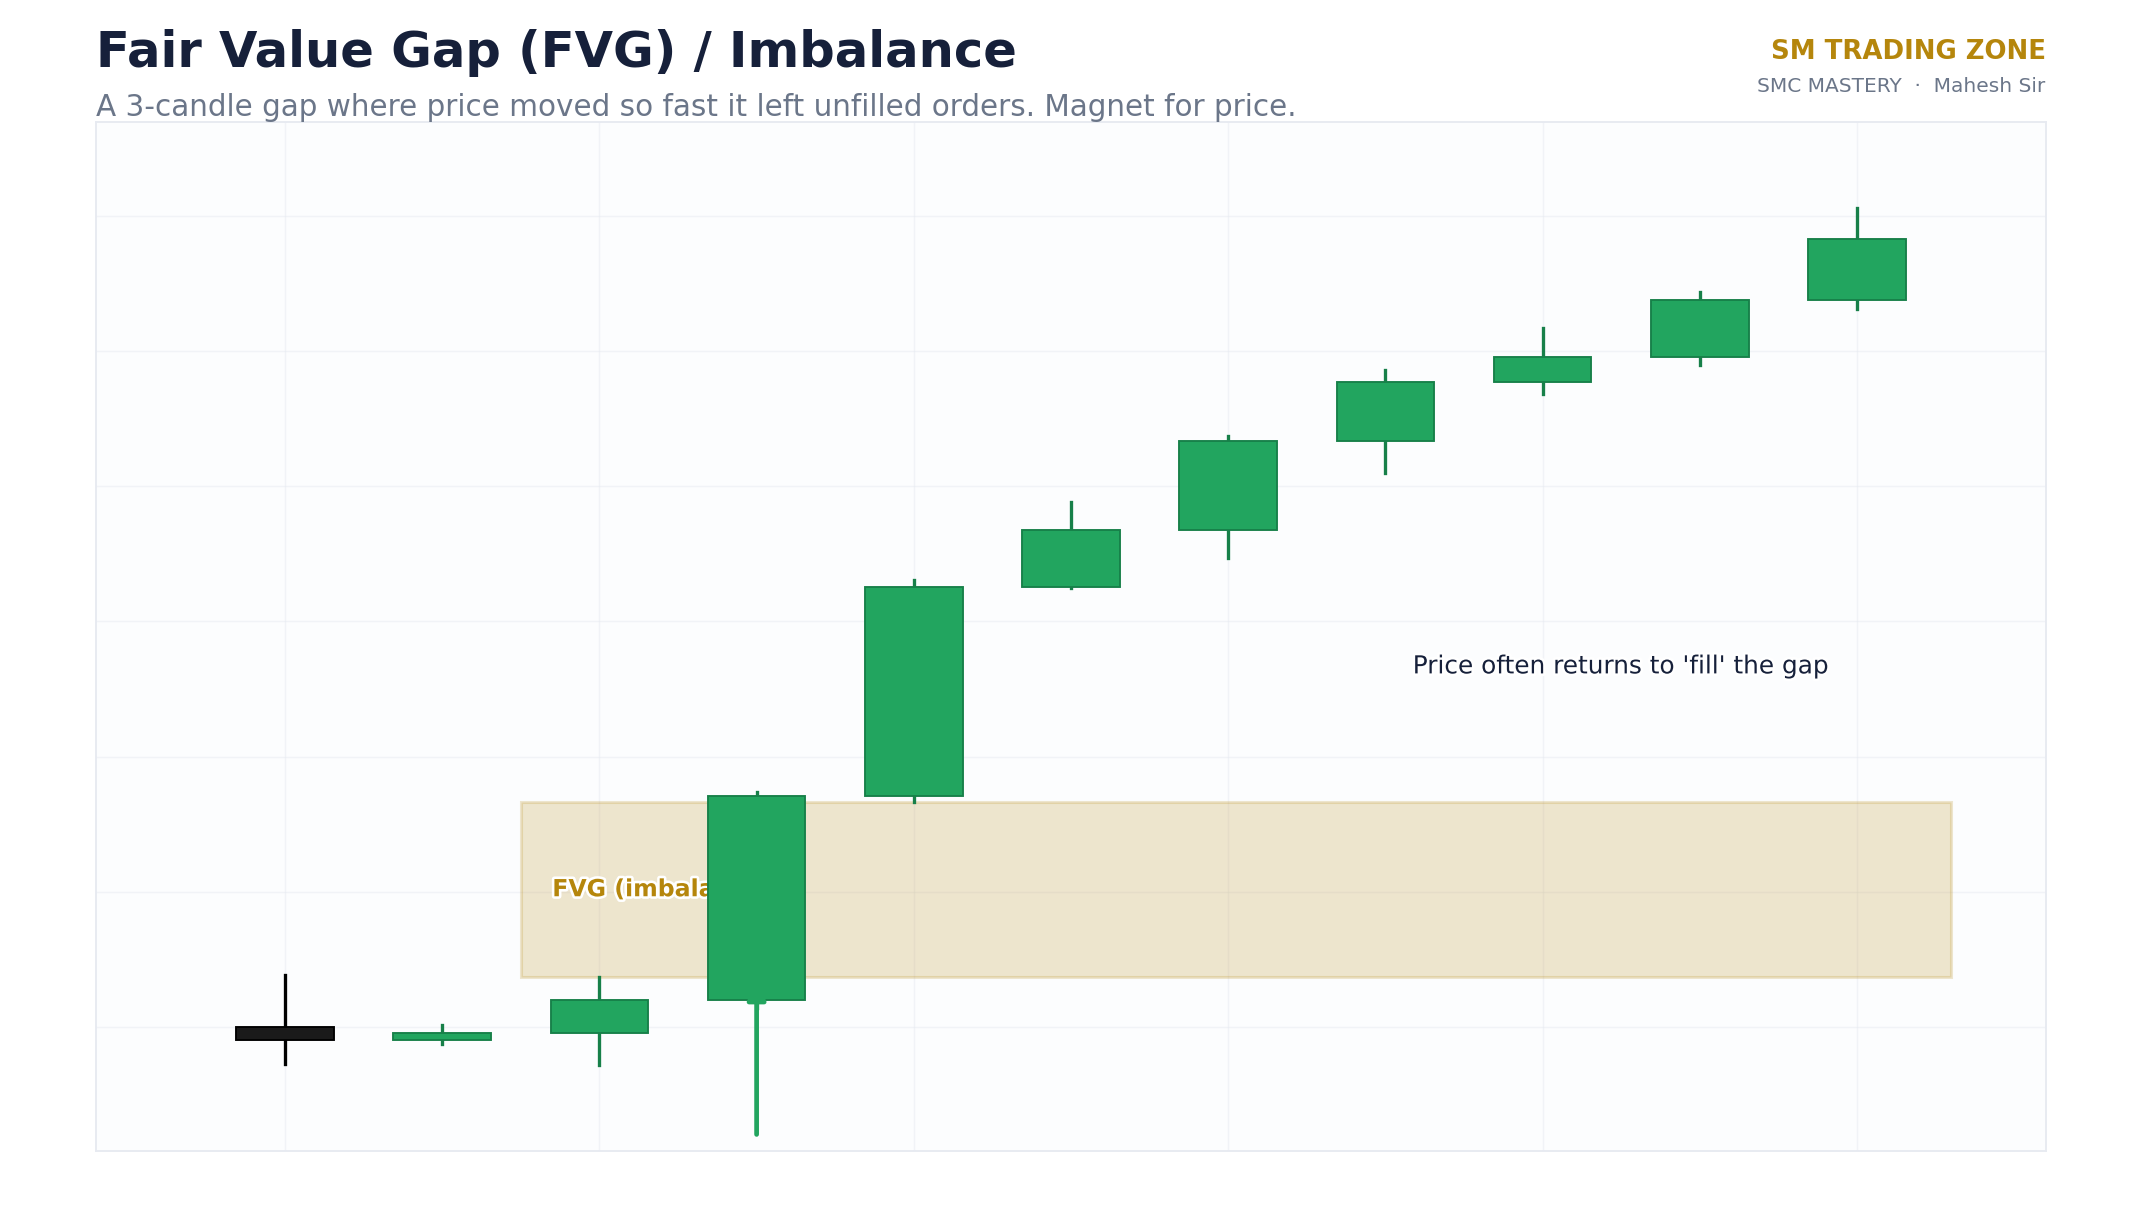
Size and context matter more than mere existence. FVGs print constantly on low timeframes; the meaningful ones are carved by genuine displacement — an impulsive candle that also breaks structure or sweeps liquidity — not by drift in a dead session.
Why gaps fill: the rebalancing logic
The classic observation is that price tends to return to fair value gaps and trade through them — "gaps get filled." The SMC explanation is rebalancing. Inside the gap, only one side of the auction transacted. Sellers who would have sold at those prices never got the chance; a large buyer who launched the move may still have unfilled size and would happily add at those cheaper prices. When price later rotates back into the gap, both sides finally transact there — the auction completes, the imbalance is rebalanced.
Two honest caveats. First, "tends to fill" is not "must fill" — strong trends can leave gaps open for a very long time, and some never fill. Second, filling is not the trade idea by itself. What makes an FVG useful is the reaction that often occurs on the first return: if the original mover defends the zone, price dips into the gap, rebalances, and continues in the direction of the displacement. That first-touch reaction is why SMC traders treat quality FVGs as entry zones rather than magnets.
Inversion FVG: when the gap changes sides
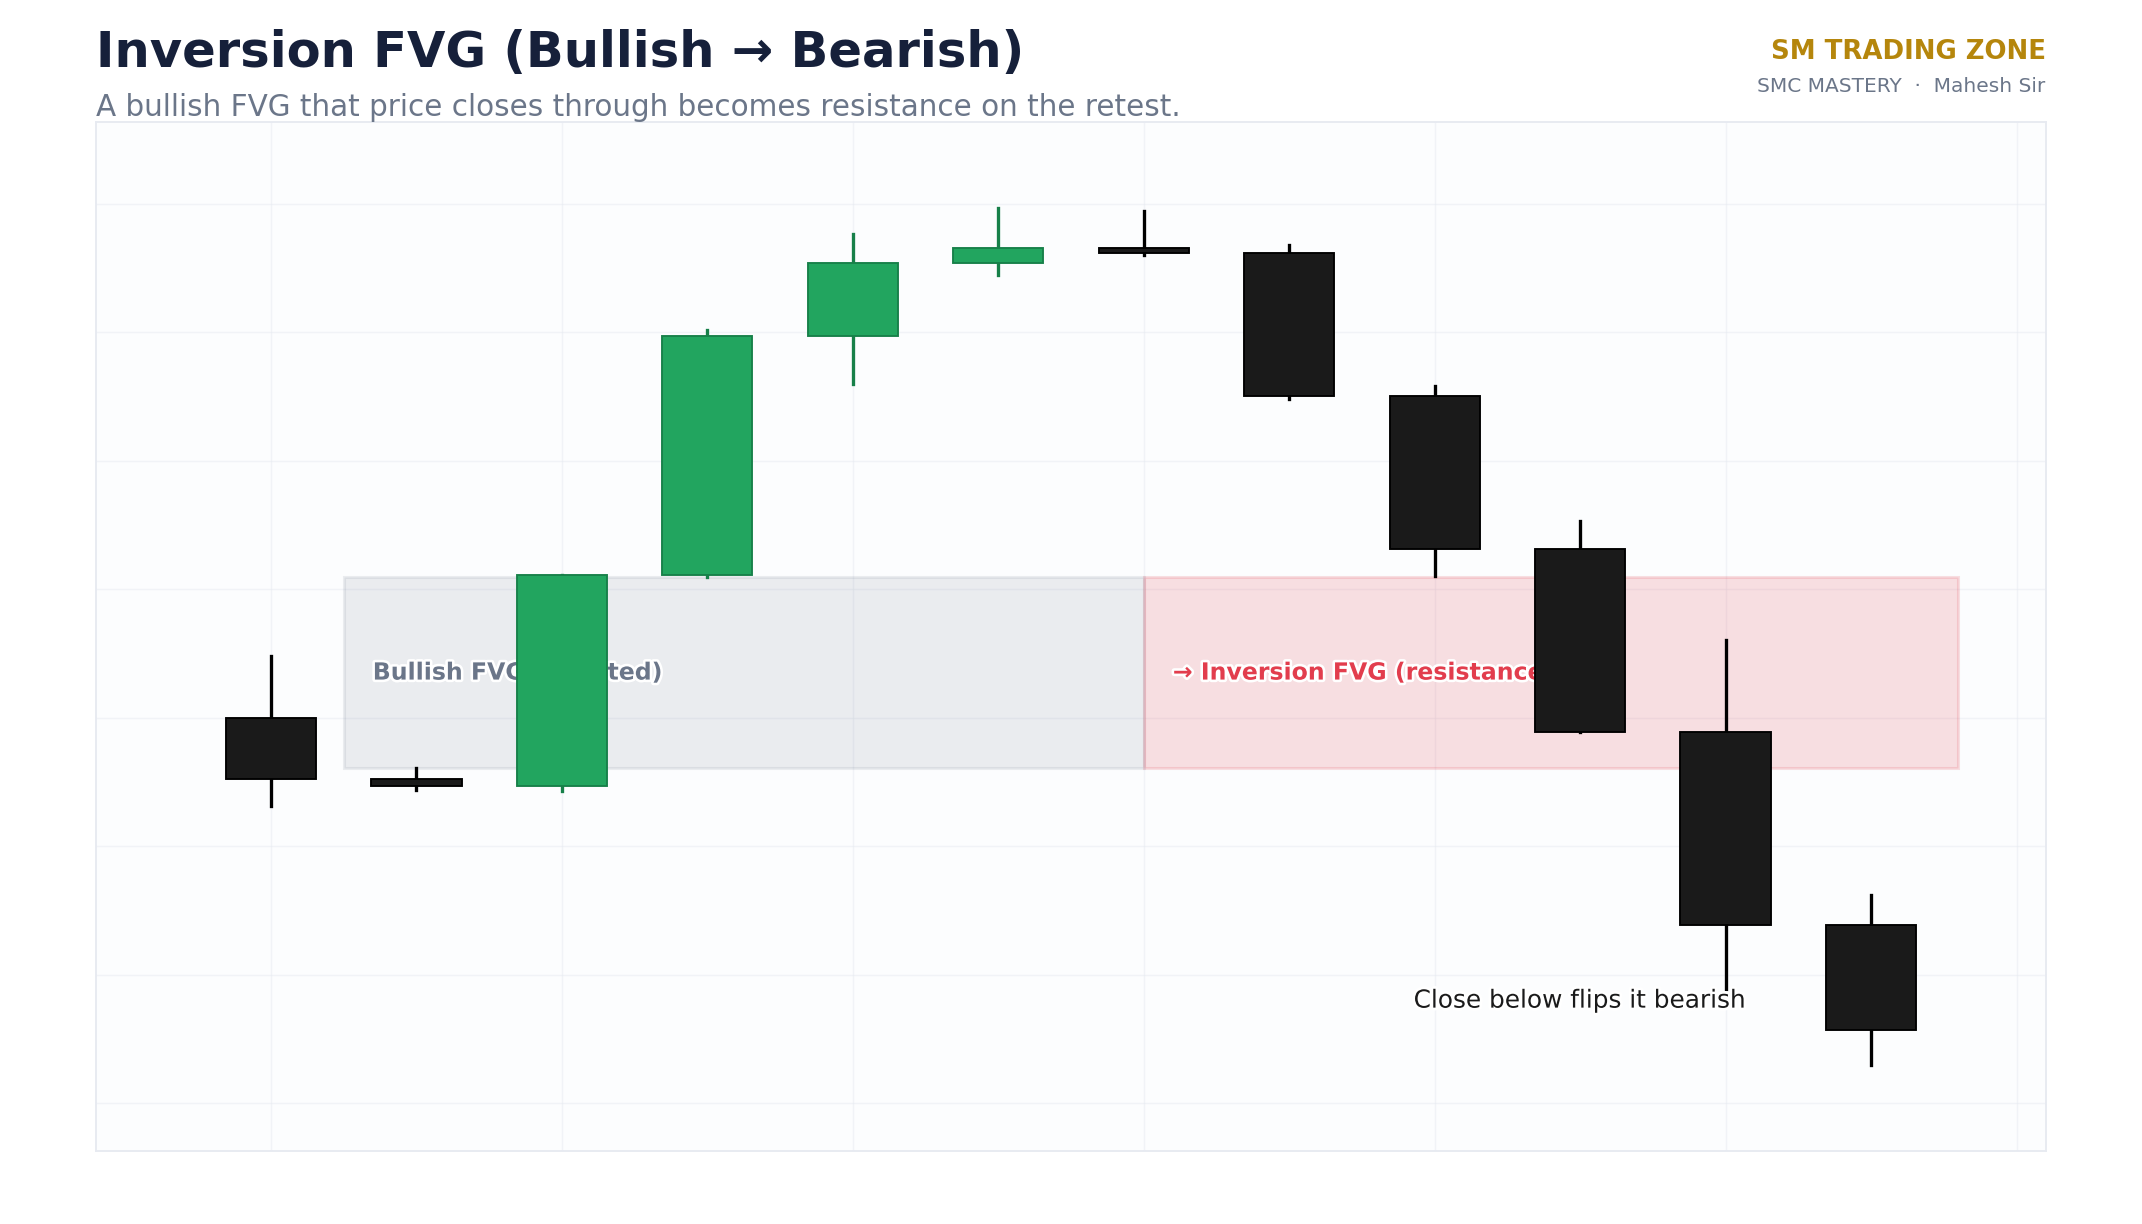
What happens when price doesn't respect the gap — when it slices straight through a bullish FVG and closes below it? The gap has failed as support, but it hasn't become irrelevant. A filled-and-broken FVG frequently flips roles: former support becomes resistance and vice versa. In SMC vocabulary this is an inversion FVG (iFVG).
The logic mirrors the classic support/resistance flip. Traders who bought the bullish gap are now trapped underwater; when price rallies back up into the same band, their break-even selling — plus fresh sellers reading the failure — supplies resistance. An iFVG is therefore evidence of defeated intent, and it is most useful right after a change of character, when the market is switching sides and old bullish zones start acting bearish.
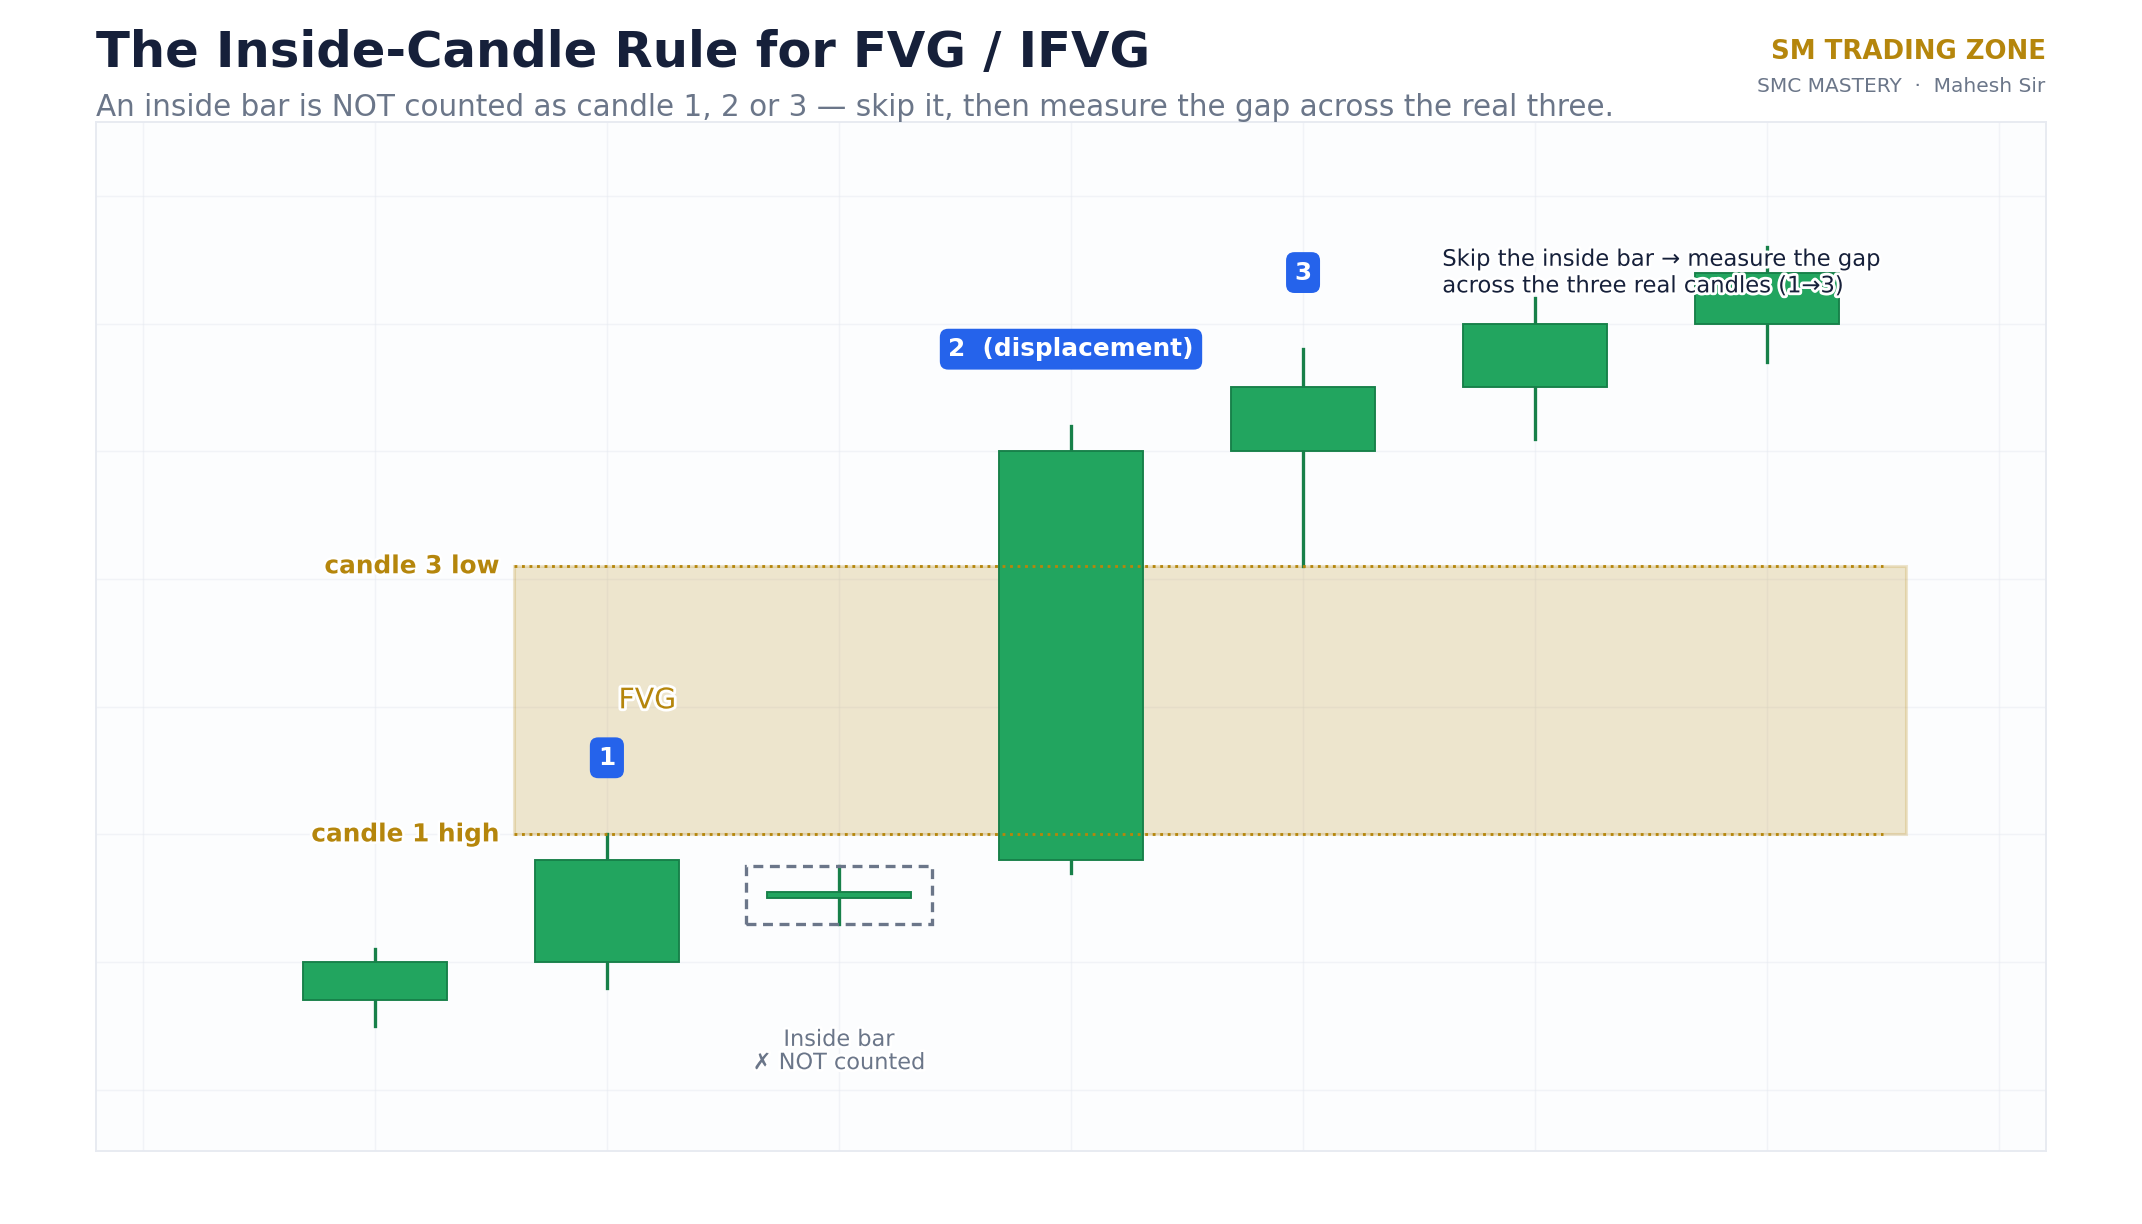
The inside-bar rule: cleaner gaps by construction
Why does this matter in practice? Naive three-candle scanning treats every bar as a potential pattern member. When one of the three is an inside bar, the "gap" it defines is often a phantom — a sliver created by a candle that merely sat inside its parent's range while the market caught its breath. Phantom gaps clutter the chart, invite entries into zones with no displacement behind them, and — worse — can distort the measured edges of a genuine gap. Skipping inside bars and pairing the true range-extending candles produces fewer, larger, more meaningful FVGs. If you mark gaps by hand, apply the same discipline: when you see an inside bar in the pattern, look through it to the last candle that actually made new range.
Using FVGs to refine entries
An FVG alone is not a trade. Its highest use is as a refinement layer on top of a read you already have from structure and liquidity:
- Trade with the displacement, in context. The A-grade setup is an FVG carved by the impulse that broke structure, sitting in discount (for longs) or premium (for shorts) of the dealing range — ideally after a liquidity sweep supplied the fuel. Alignment, not the gap itself, is the edge.
- Use the gap to place the entry, not to find the idea. Bias comes from structure; the FVG tells you where inside the pullback to set a limit order instead of chasing. Common tactics: enter at the gap's edge, at its 50% (the consequent encroachment of the gap), or on the first reactive candle inside it.
- Let the gap define the invalidation. A full body close through the far side of the gap says the rebalance failed — and hands you an iFVG to watch in the other direction. Stops beyond the gap (or beyond the zone that contains it) make the risk mechanical.
- Prefer fresh gaps. A gap that has already been revisited has spent much of its resting interest. First touch carries the cleanest reaction; third touch is usually a door left open.
Treat every FVG as a hypothesis about unfinished business — one the market is free to reject. Sized properly, a failed gap costs you one controlled loss and gives you information (an inversion level) in return. That exchange is what technical trading actually is.
Key takeaways
- An FVG is a three-candle imbalance: a band of prices skipped by a displacement candle, where only one side of the auction transacted.
- Gaps tend to fill because unfilled interest rests inside them — but "tends" is not "must," and the first return is where the tradeable reaction lives.
- A broken FVG flips sides: the inversion FVG turns failed support into resistance (and vice versa), most potent after a CHoCH.
- Inside bars are never counted as candle 1, 2 or 3 of the pattern — skipping them removes phantom gaps and is the rule our indicators apply.
- Use FVGs to refine entries and define stops within a structure-and-liquidity read — never as standalone signals.