
Every stop-loss order is a real order. A stop under a swing low is a resting sell order that fires when the level trades; a stop above a swing high is a resting buy. Multiply that by thousands of traders using the same textbook levels, and the area just beyond every obvious high and low becomes a pool of guaranteed, pre-committed orders. In SMC language, that is resting liquidity — and to a large player who needs the other side for a big fill, it is the most valuable real estate on the chart.
Where liquidity actually rests
You can locate these pools in advance, because they form at the levels everyone can see:
- Equal highs and equal lows (EQH/EQL). Two or more matching extremes look like a "double top" ceiling or "double bottom" floor — so stops stack just beyond them. The cleaner and more equal the level, the bigger the pool, and the more attractive the target.
- Swing highs and lows. Every visible pivot carries stops behind it — sellers' stops above swing highs, buyers' stops below swing lows.
- Session and calendar levels. The previous day's high and low, the previous week's extremes, the Asian session range on gold and FX, the opening range on indices. These are published, universal reference levels — which is precisely why liquidity concentrates around them and why price so often reaches for them early in a new session.
- Trendlines and round numbers. Anywhere retail traders reliably anchor stops or breakout orders.
Once you accept that price is drawn toward liquidity, chart reading changes: instead of asking "where is support?", you start asking "whose stops get taken next?"
Engineered liquidity: the trap gets built first
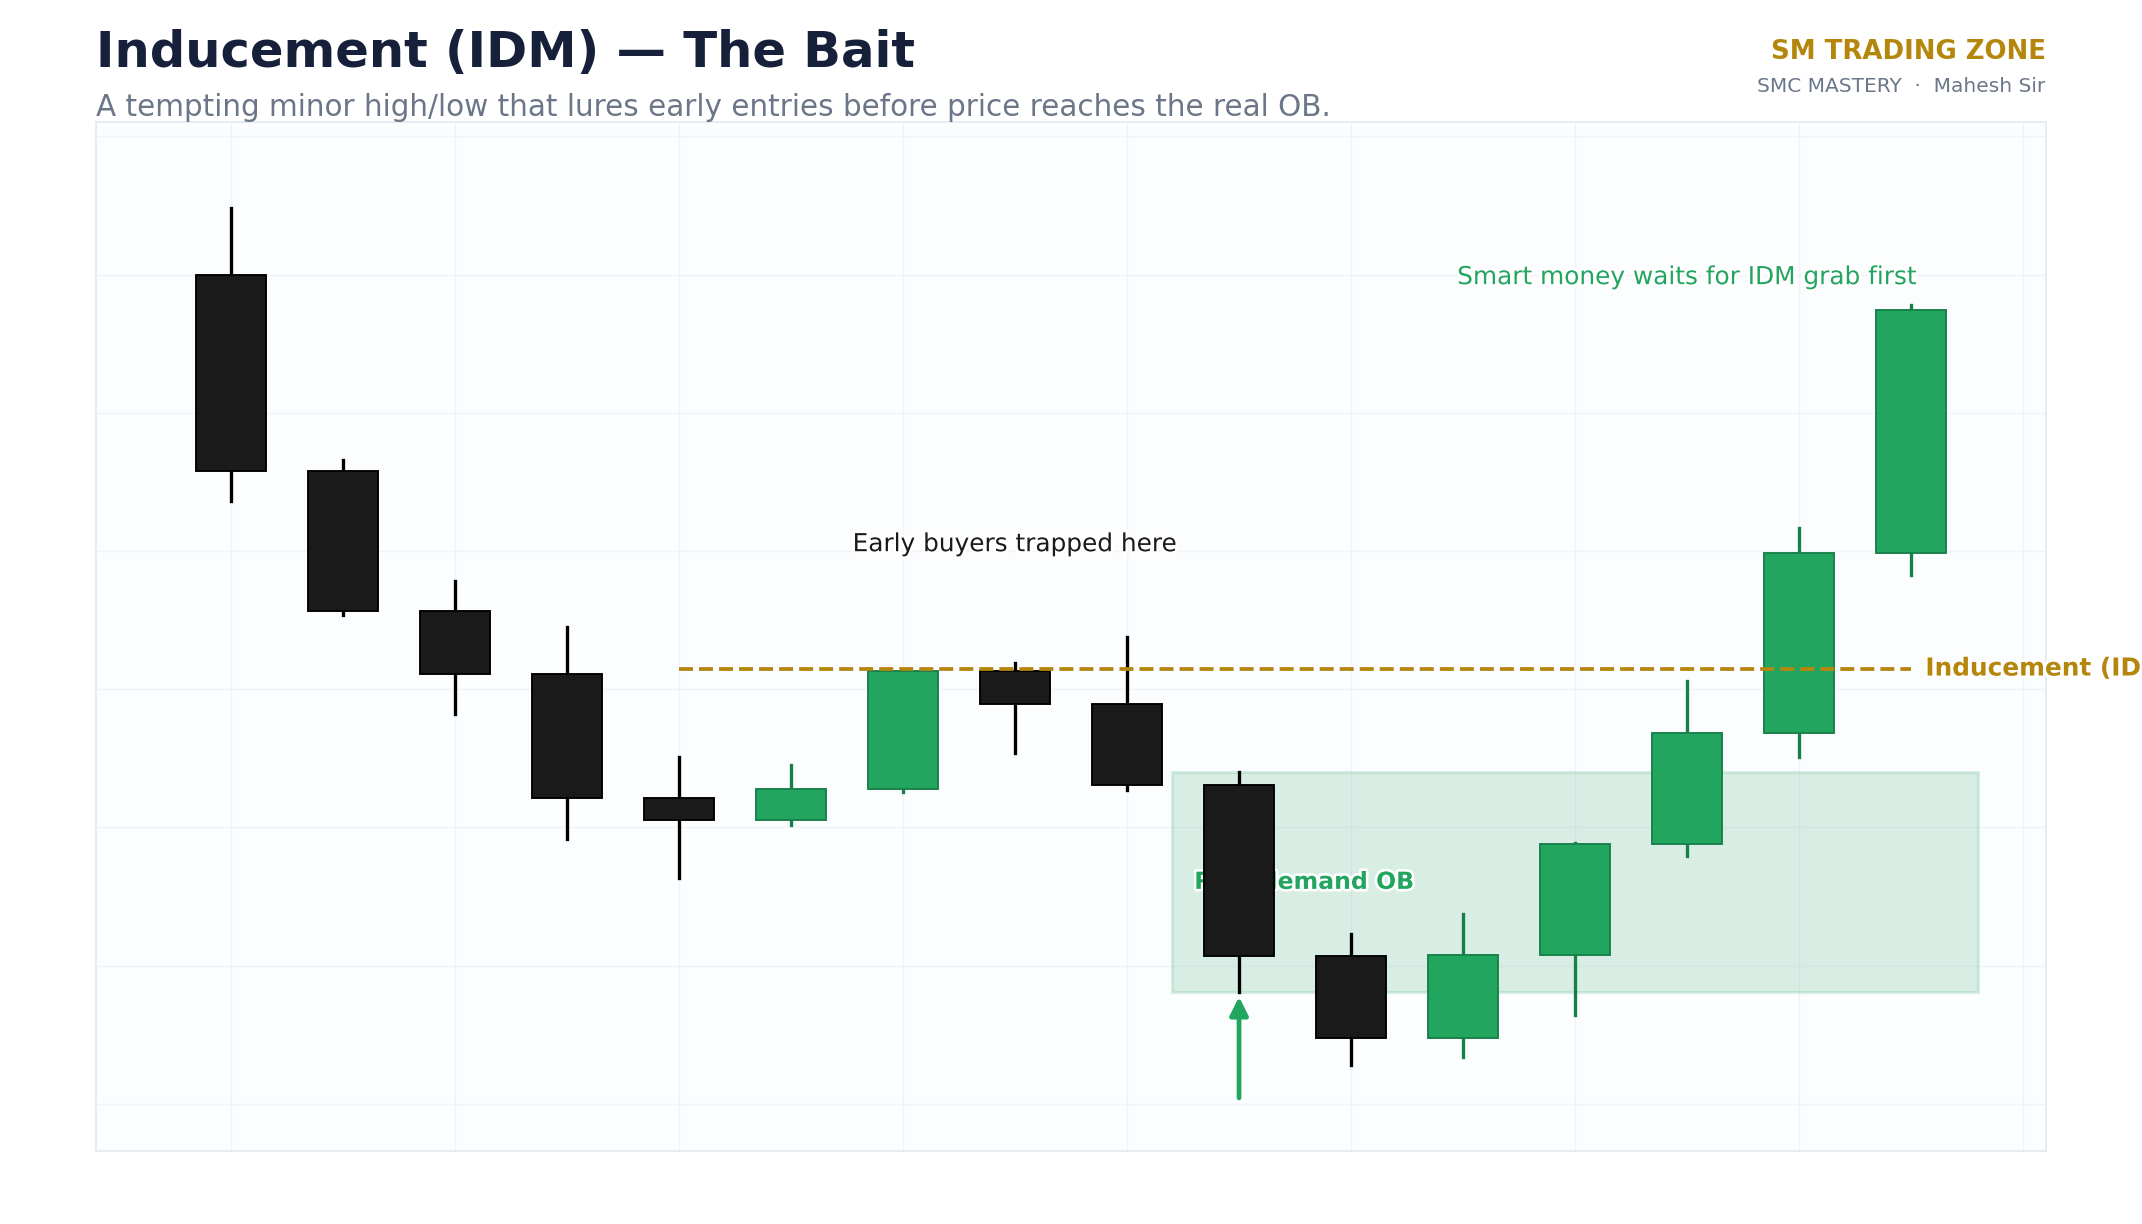
Pools don't only form by accident — they can be encouraged. A market drifting sideways above an old low invites more and more traders to buy the range floor with stops tucked underneath; each pass adds to the pool. SMC calls this engineered liquidity: price action that manufactures a crowd of predictable stops before consuming them. The clearest small-scale example is inducement — the minor pullback that forms just below a swing high, collecting early buyers' stops, before the market dips through it and then delivers the real move. The bait is laid, taken, and only then does the move happen.
Sweep vs breakout: the close-back-inside test
Here is the practical problem: a sweep and a genuine breakout look identical at the moment the level trades. Both spike through the high. The difference only reveals itself in what happens next — and there is a simple, mechanical test.
Where does the candle close? A sweep punches through the level, fills the resting orders, and then closes back inside the prior range — the excursion survives only as a wick. A breakout closes beyond the level and holds, typically with follow-through on the next candles. The close is the market's honest vote: back inside means the push found no real interest beyond the level except the stops it came to collect; beyond means genuine acceptance at new prices.
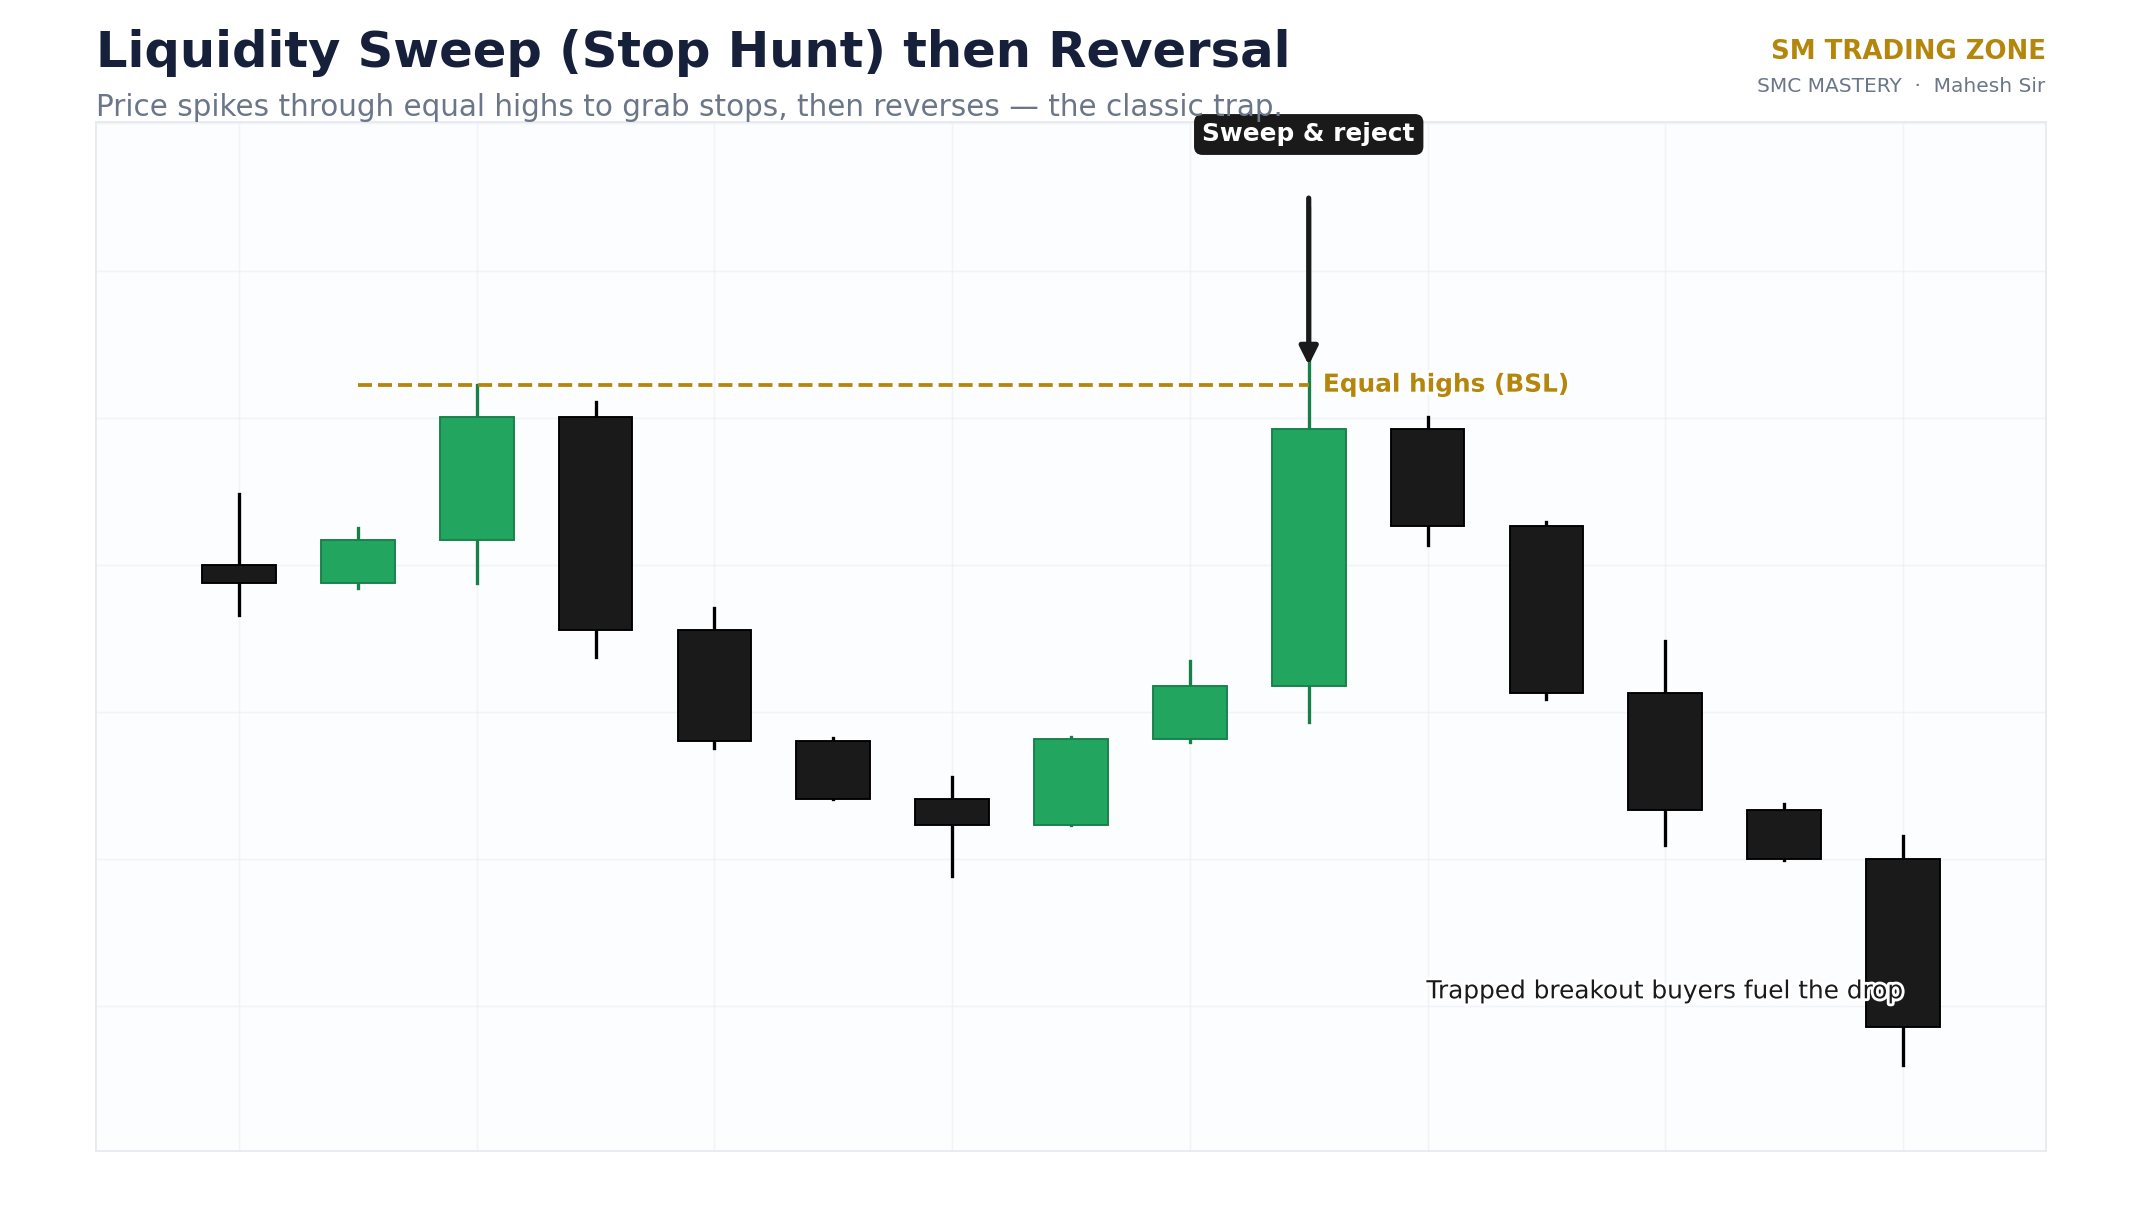
This is the same body-close discipline that governs structure breaks: wicks report where price visited; closes report where it was accepted. Wait for the close before you label the event — the traders who buy the first tick above equal highs are usually the liquidity.
Same-bar SFP vs multi-bar reclaim
Sweeps resolve on two timescales, and it pays to name them separately:
- Same-bar sweep (SFP). One candle does the whole job: trades through the level and closes back inside within the same bar, leaving the classic long wick — a swing failure pattern. This is the fastest, most aggressive form of rejection, and the strictest confirmation, since a single closed candle settles the question.
- Multi-bar reclaim. Price closes beyond the level — one, two, a handful of bars actually hold outside the range — and then a candle closes back inside, reclaiming the level. The initial "breakout" is revealed as a trap; the traders who chased it are now stuck on the wrong side, and their exits fuel the reversal. Reclaims are slower and slightly noisier, but they catch the sweeps that a same-bar rule misses.
Neither mode is universally better. Same-bar detection is cleaner but rarer; reclaim detection covers more real-world traps but needs a defined patience limit (how many bars outside the range before the trap idea is dead). Good tooling — and good manual traders — make this an explicit setting rather than a mood.
Trading sweeps as entries, not as your exit
Everything above turns the stop hunt from an insult into a signal. The sweep is one of the highest-information events in SMC because it tells you fuel was just consumed and a trap may have just sprung. A disciplined way to use it:
- Mark the pools in advance. Equal highs/lows, previous day/week extremes, session ranges. Before the session, know where the market's fuel is sitting.
- Let the sweep happen, then demand confirmation. The close-back-inside is step one. Stronger setups add a structure shift right after the sweep — a CHoCH on your entry timeframe — proving the other side has actually taken control.
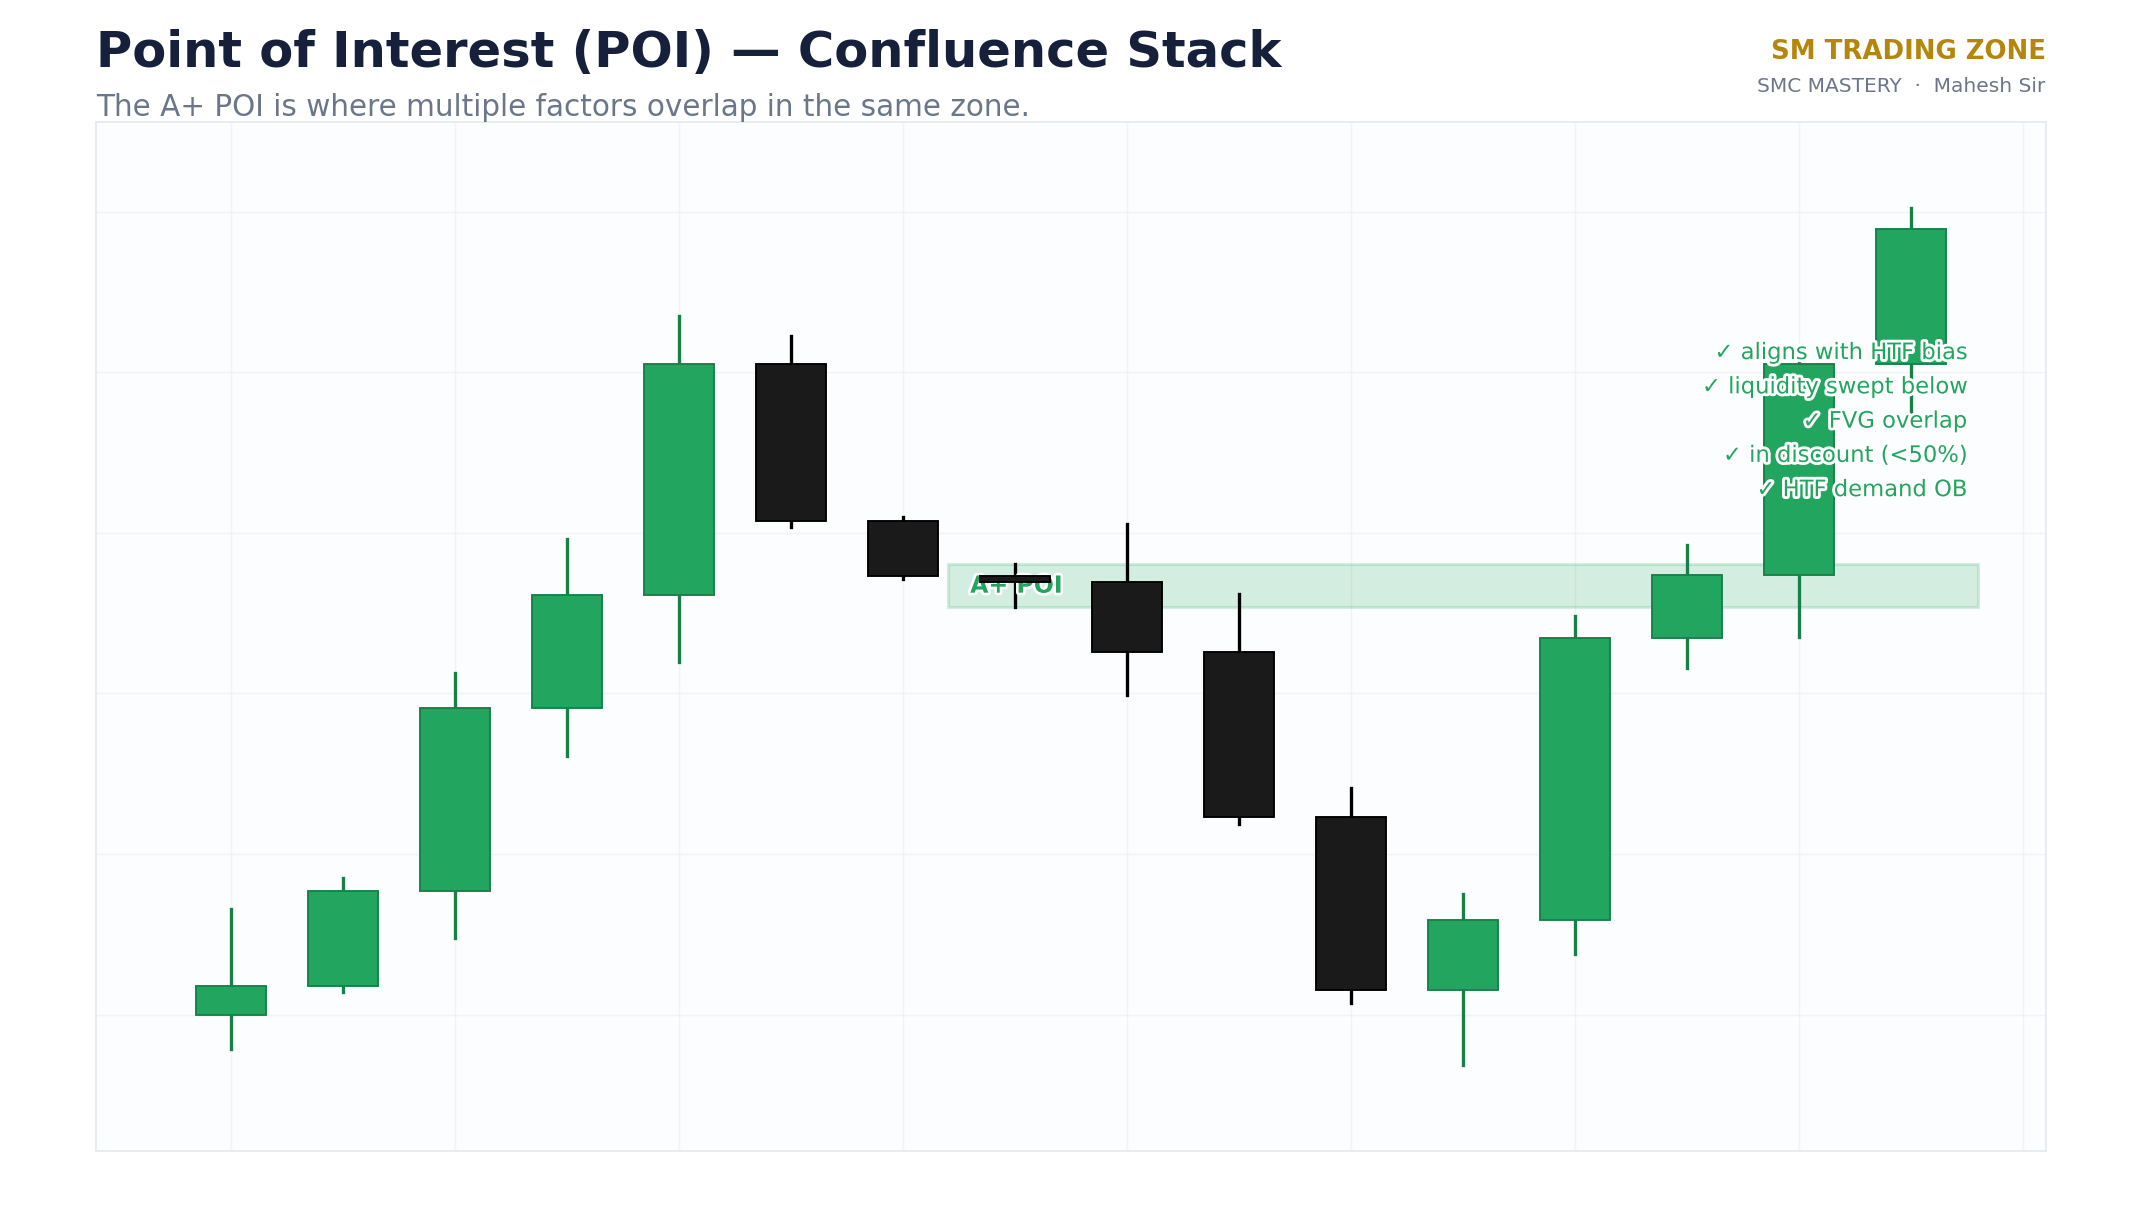
- Enter at a point of interest, not at the wick. After sweep plus shift, price usually pulls back. The entry lives at the zone that caused the reversal — an order block or FVG left by the displacement — with the sweep extreme as your invalidation.
- Place stops beyond the sweep wick, sized to survive. The level that was just swept is spent; a stop beyond it is protected by the very mechanics this guide describes. And accept the honest truth: sometimes the pool beyond that gets hunted too. Position sizing, not indignation, is the answer.
- Stop parking stops at the obvious pixel. If your stop sits exactly under equal lows with the rest of the crowd, you are part of the pool. Either place it beyond the deeper structural level or accept the trade doesn't offer room.
No sweep setup wins every time — nothing does. But once you can tell consumed liquidity from accepted breakout, you stop donating your stop-loss to the move you correctly predicted. That alone changes how trading feels.
Key takeaways
- Stops are real resting orders — they pool beyond equal highs/lows, swing points, and previous session/day/week extremes, and price is drawn toward them.
- Liquidity can be engineered: ranges and inducement pockets build a crowd of predictable stops before the market consumes them.
- The close-back-inside test separates sweep from breakout: wick through and close inside = sweep; close and hold beyond = breakout.
- Sweeps resolve two ways — same-bar SFP or multi-bar reclaim — and each needs its own confirmation rule.
- Trade the aftermath: sweep → structure shift → entry at the order block or FVG, with the stop beyond the swept extreme.